Here’s a super quick tutorial that’ll take you through the process of downloading and installing the Divi theme on a brand new WordPress website.
This post will show you how to:
- Download the Divi theme from the Elegant Themes website
- Install the Divi theme on your WordPress website
- Enter your API key to enable theme updates
At the end of this post, I’ll also share a brief explanation of child themes and the importance of using them in development.
Let’s go!
How to Install the Divi theme on your WordPress website
Once you’ve set up a brand new WordPress installation, the first thing you need to do is upload and activate your theme. Fun fact, a brand new, fresh WordPress installation is called an instance. I have no idea why it’s called this, it must be a code thing, but if you see the term WordPress instance on the web, know it’s just a WordPress site, fresh out of the box and bare-bones with nothing on it.
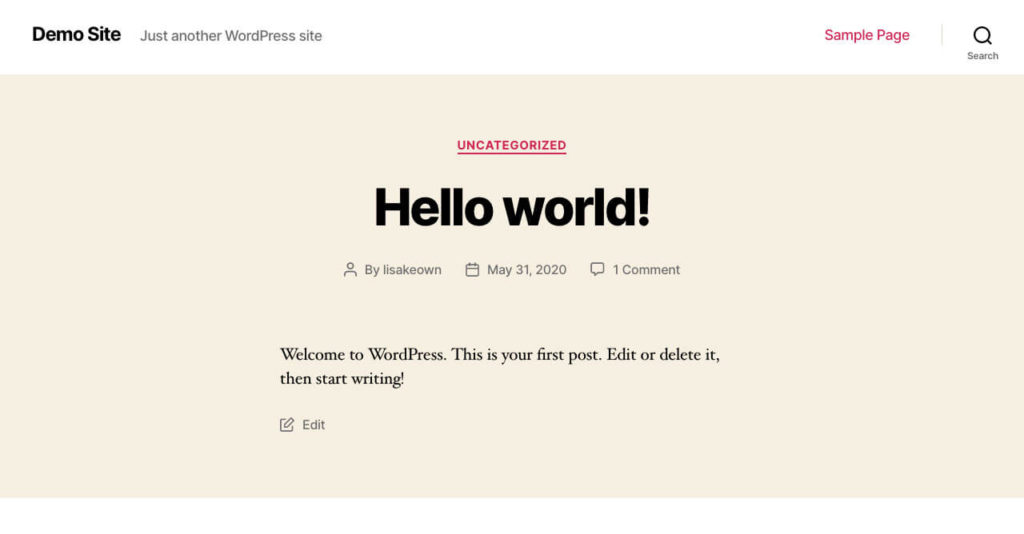
For this blog post, I’m assuming that WordPress is already set up and installed on your server. By default, WordPress will automatically use one of the standard system themes to display on your site. In this example, I’ve created a brand new WordPress instance on a local development environment, and by default, the Twenty Twenty WordPress theme is active. With this, the front-end of my WordPress website looks like this:
Once your WordPress instance is ready to go, it’s time to add your theme.
Download the Divi theme
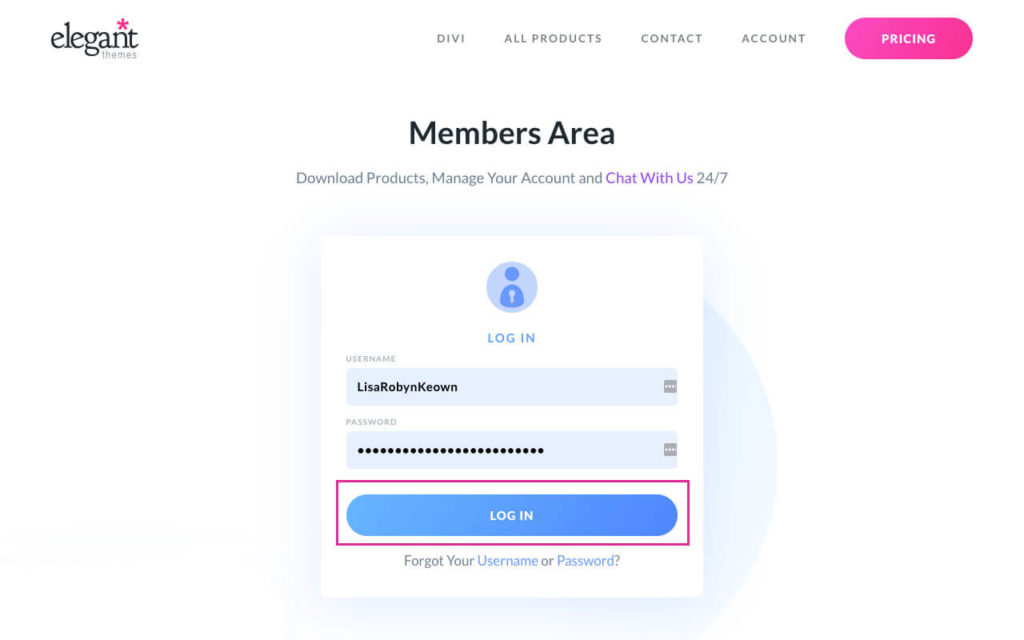
To download the Divi theme, visit the Elegant Themes website, click on the Account tab in the menu and log into your account. Enter your Username and Password, and click Login to gain access to your Members Area.
If you haven’t purchased the Divi theme yet, you can sign up and create an account here.
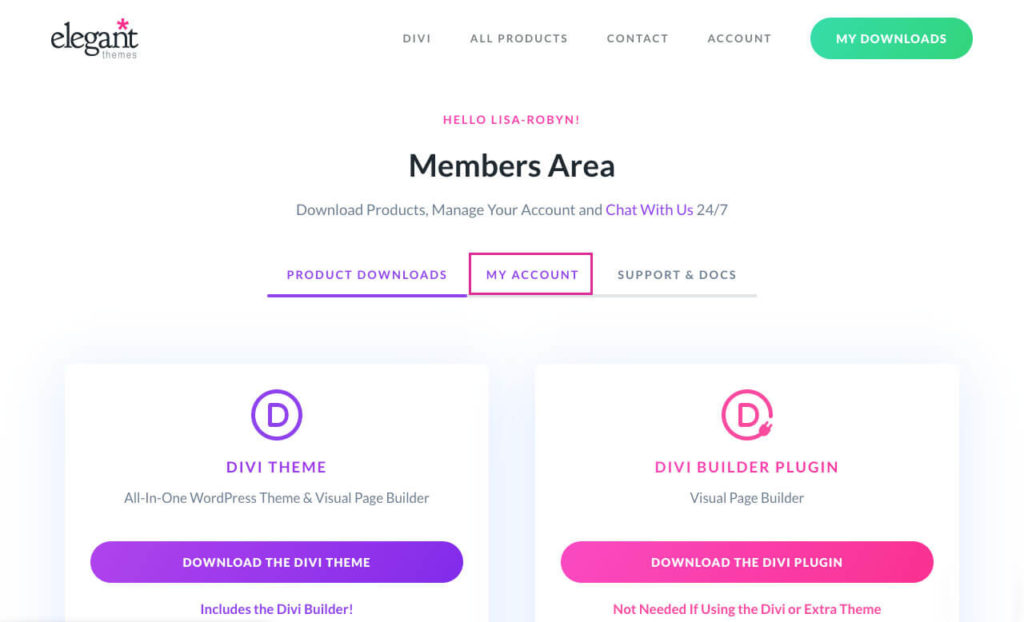
Once you’re in the Members Area, you should automatically land on the Product Downloads tab. Here, you’ll see all of the products available to you in your Elegant Themes membership, including:
- themes (such as Divi and Extra), and
- plugins (such as Monarch and Bloom)
As we’re only concerned about the Divi theme, click on the bright purple button that says Download the Divi Theme.

Your download will begin automatically, and, once complete, you’ll see a file titled Divi.zip in your Downloads folder. I think this folder is called ‘My Downloads’ on a PC, but I’m not too sure.
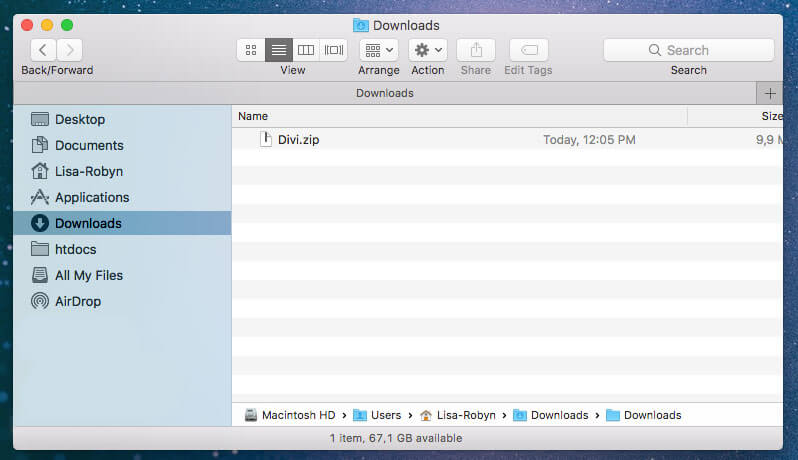
Super important: WordPress themes and plugins must be uploaded using the original .zip file. Do not unzip the .zip file. Keep it as is, in its compressed state, and upload it as such.
Now that your download is complete, log in to your WordPress website.
Install the Divi theme on your WordPress website
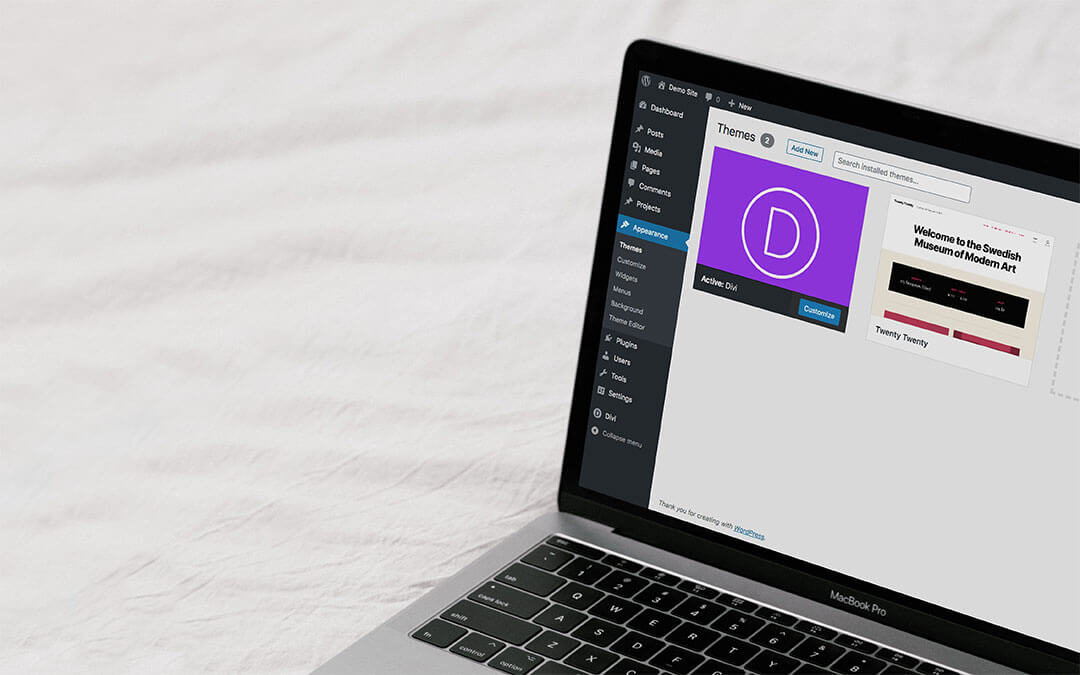
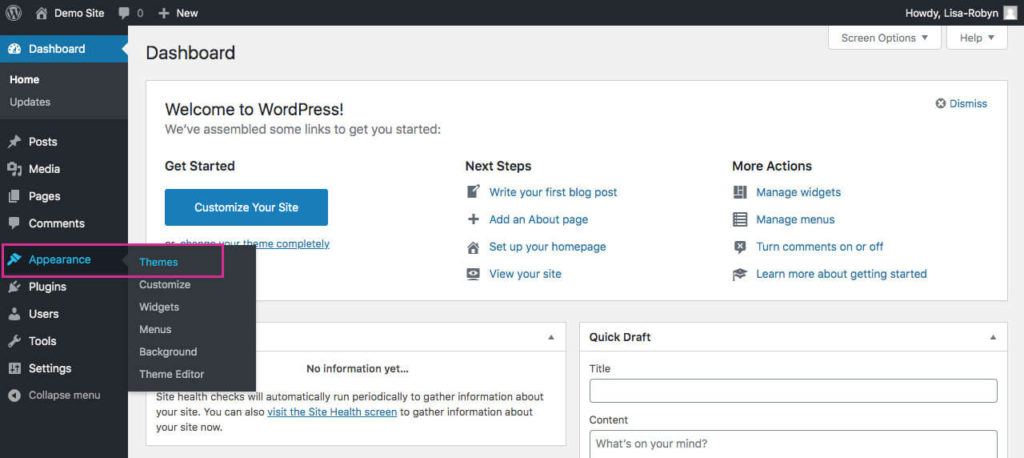
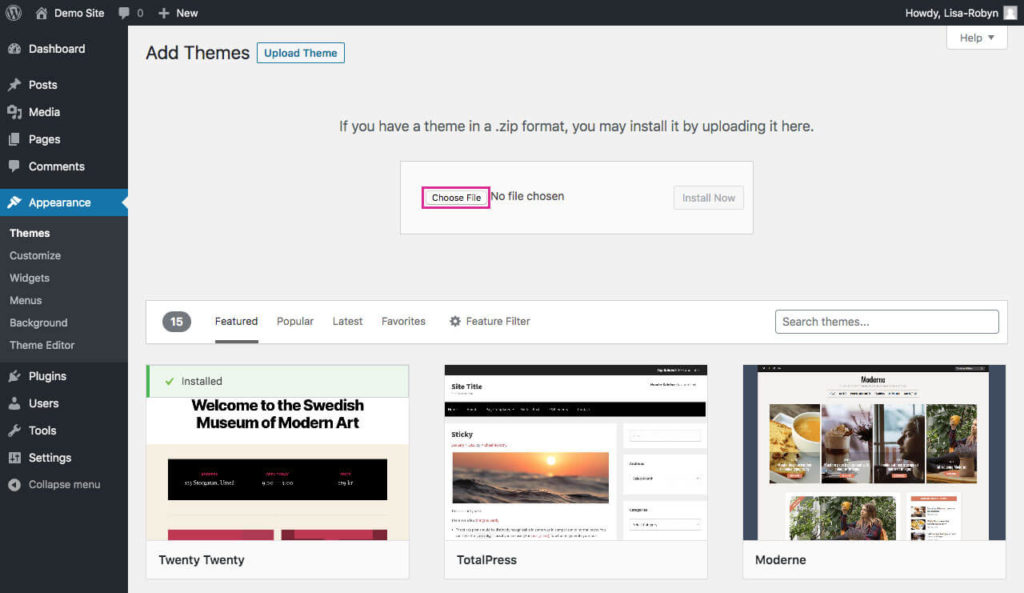
Once you’ve logged into the WordPress dashboard, navigate to Appearance > Themes.
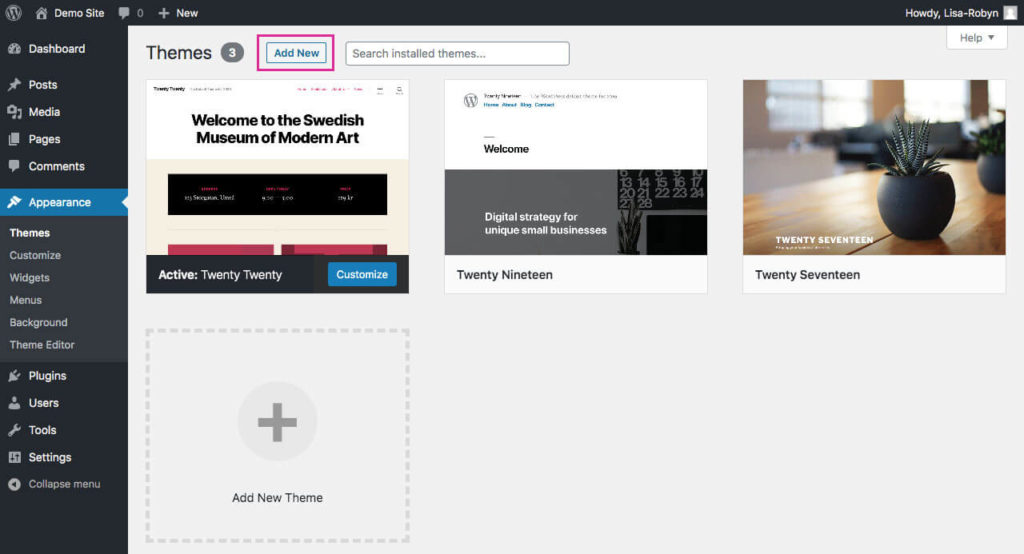
Here you will see all of the themes associated with your WordPress website. By default, WordPress will automatically include a few of the standard system themes, created by WordPress itself. These themes are named after the year that they were released.
In my demo site, the most recent theme, Twenty Twenty, is Active. I’ll come back to these system themes later, for now, click on the Add New button at the top of the screen.
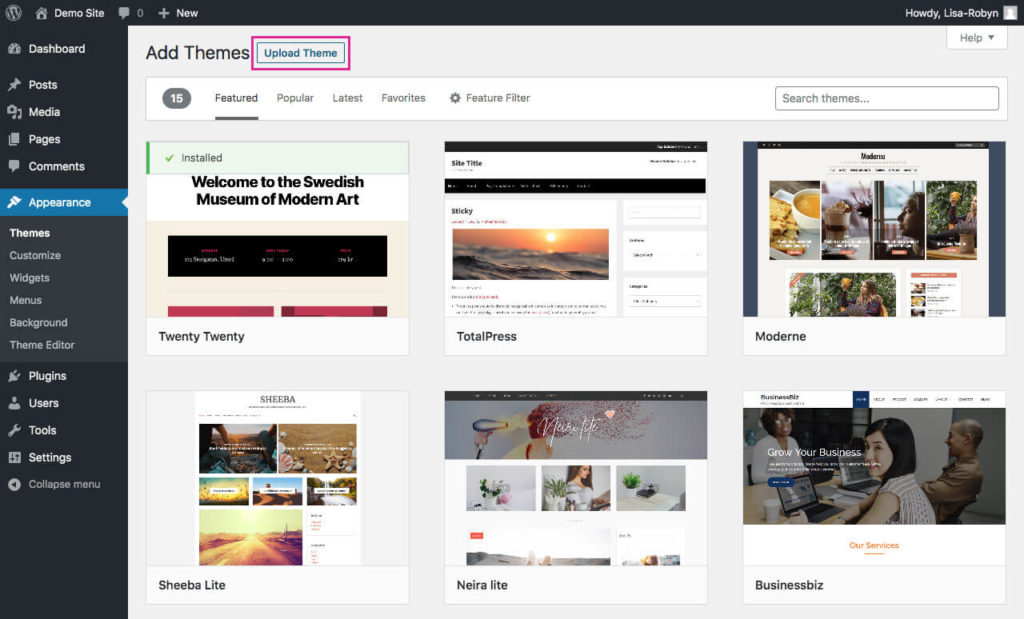
This will take you to another screen. Here, you’ll see several free themes offered by WordPress. I have never explored this section or these themes. I’m sure there are some great free themes here, but I’m a big Divi fan so won’t stray from this product any time soon.
To add the Divi theme, click the Upload Theme button.
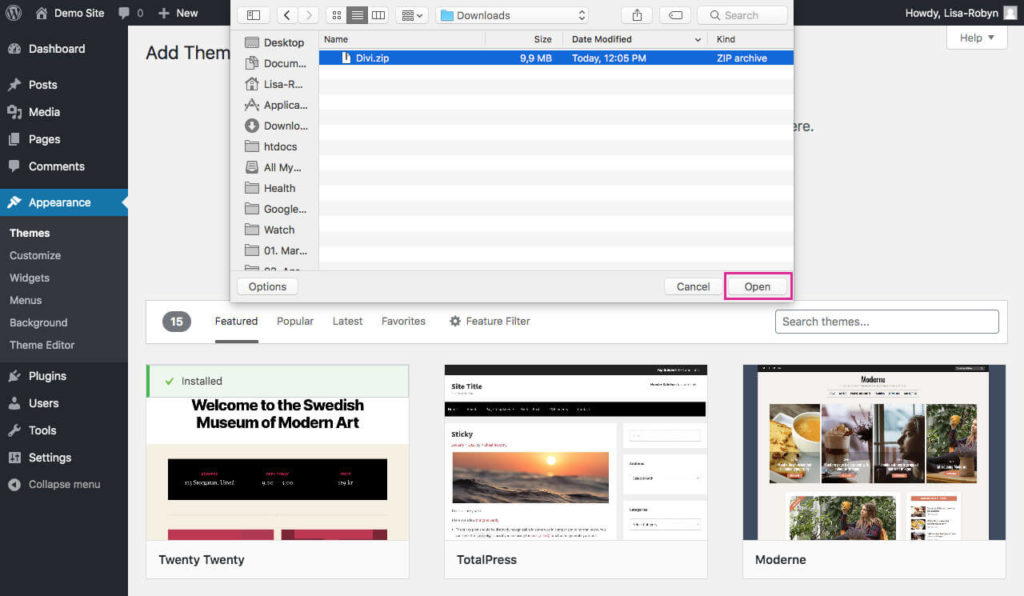
Now, you’ll see a file upload console. Click the Choose File button.
A window will open inside your browser, allowing you to navigate your computer’s files. Locate and select the Divi.zip file, recently downloaded from the Elegant Themes website. Click Open.
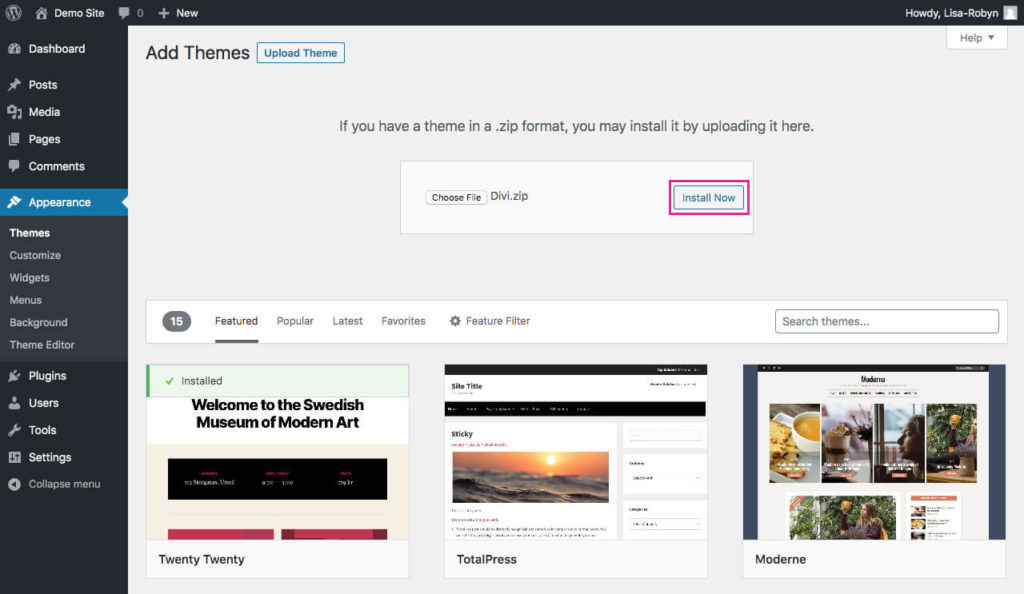
Once the file has is selected, click Install Now. The installation process generally takes a few moments.
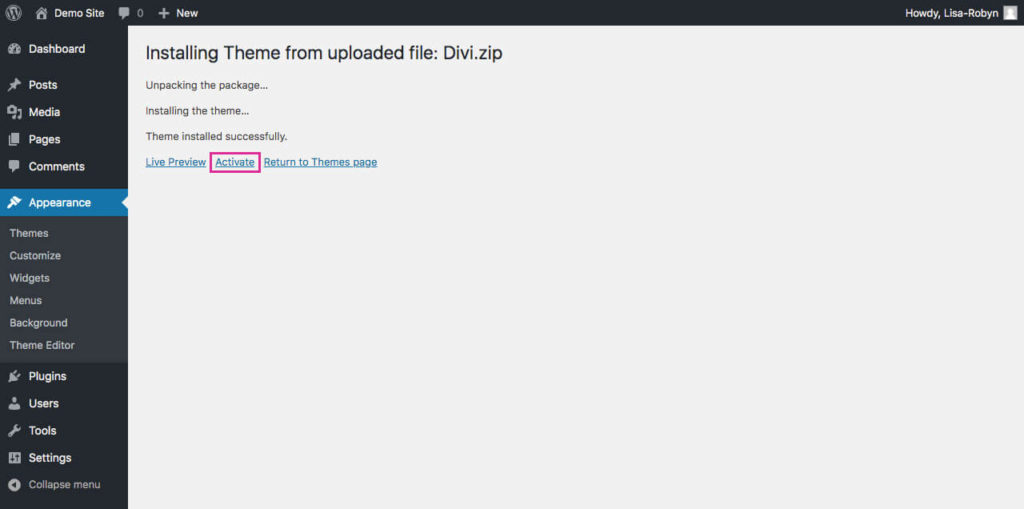
As soon as the theme package is installed correctly, you’ll see a success message that states, ‘Theme installed successfully.’ This step is really important as sometimes people forget to do it, but, as soon as you see this screen, click Activate.
You’ll be redirected to the main theme listing page, and will see that the Divi theme is now active.

You’ll also notice a new menu item is added to your WordPress dashboard. This menu tab will take you to the Divi Theme Options console, an extensive settings and configuration dashboard that gives you more customisation options for your theme. More on this later.
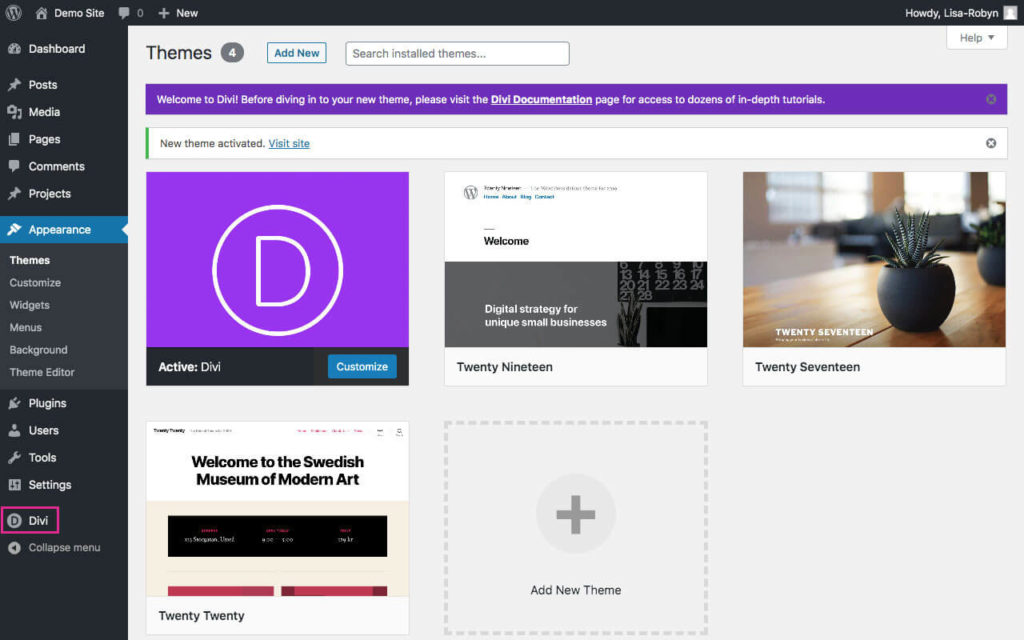
Before continuing, it’s a good idea to clean up your WordPress theme dashboard by deleting the unnecessary default system themes that came with your site. These have no real purpose and will just take up precious server space.
It’s a good idea to leave one of these themes on your site, so keep the most recent theme, Twenty Twenty, installed but not activated. To delete a system default theme, Twenty Nineteen, for example, click on the theme thumbnail, and, when the window pops up, click the red Delete button. An alert message will pop up asking if you’re sure you want to delete the theme file. Click Ok.
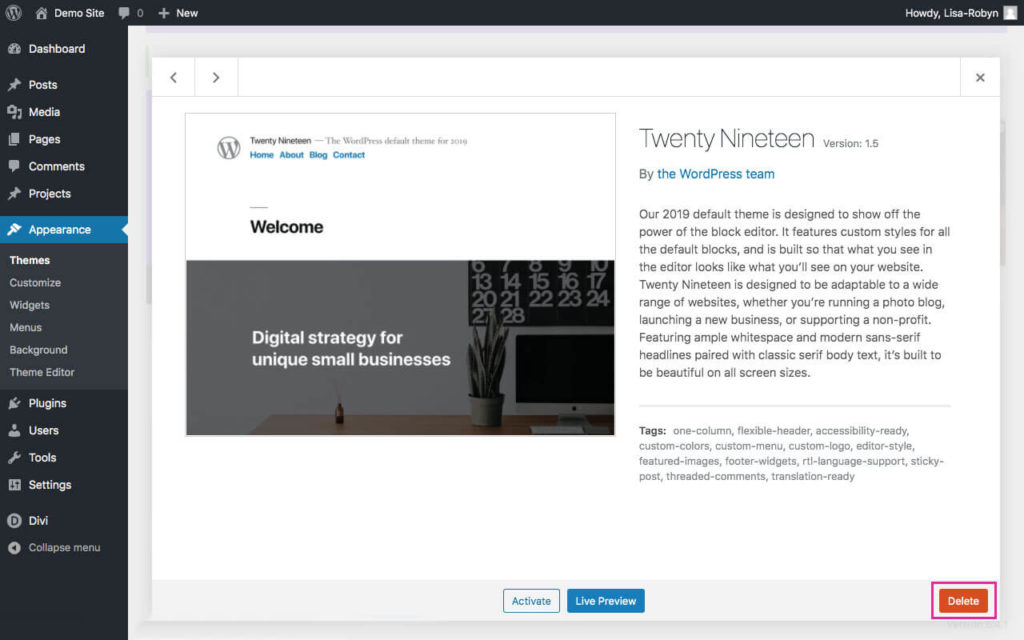
You can repeat this with any other system theme you see added by default. Remember to keep one default theme, the latest one, in your theme dashboard.
Now, you can go on and play with the Divi theme, develop your website and so on, however, at some point, you’ll need to authorise your Elegant Themes account by entering your username and API key.
This step doesn’t need to be done immediately, but it’ll come up in time. Without this authorisation of entering your API key, your website won’t be able to receive updates of the Divi theme, when released by Elegant Themes.
Enter your API key to enable theme updates
To find your API key, you’ll need to head back to the Elegant Themes website and log into your account.
Once you have logged into your account, click on the My Account tab from the Members Area dashboard.
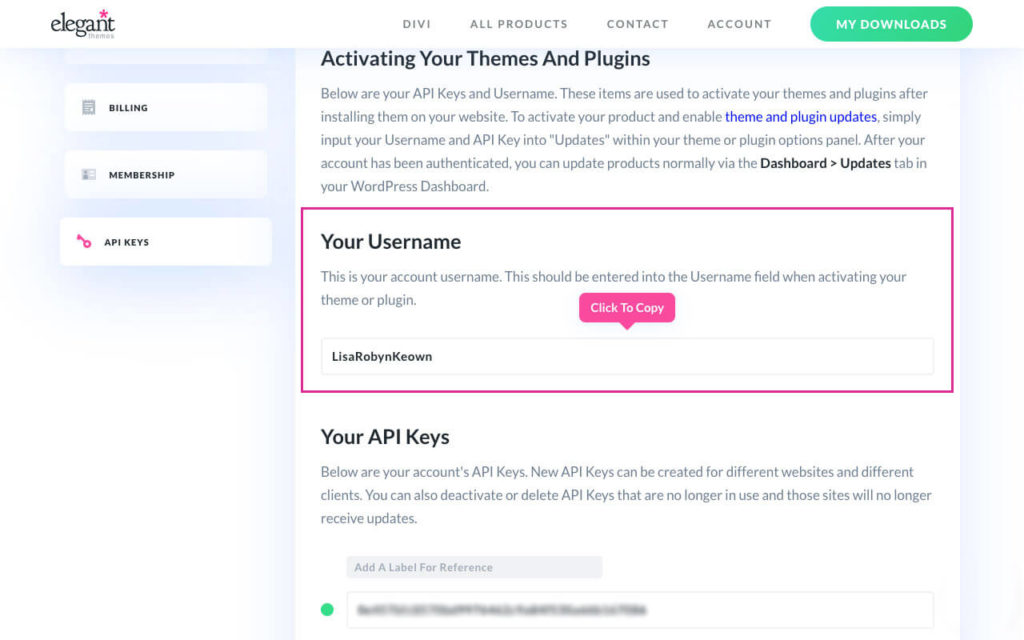
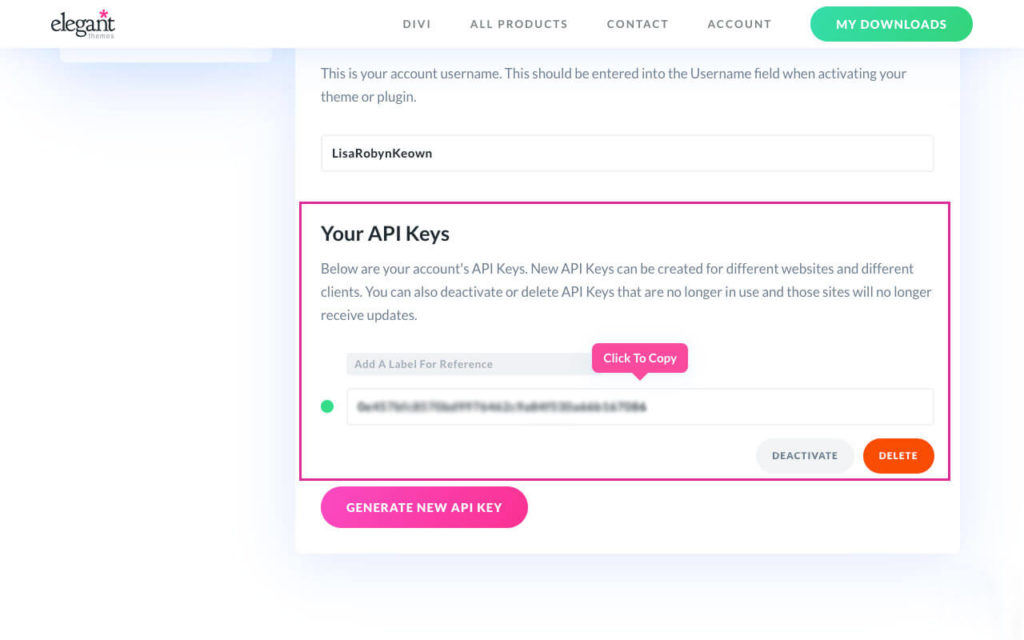
By default, you will land on the Account Details tab. Click on the API keys tab.

Here you’ll find information relating to your API keys including what the API key is, what it does and how you can install it on your Divi website. Two important pieces of information here your username and your API key. Both of these bits of information will be needed to enable updates on your Divi website.
First, copy the username. Simply clicking on the username itself will copy it to your clipboard.
Now, return to your WordPress website. Hover over the Divi menu and click Divi Theme Options. Here, you’ll find an entirely new set of options for customising your Divi website.
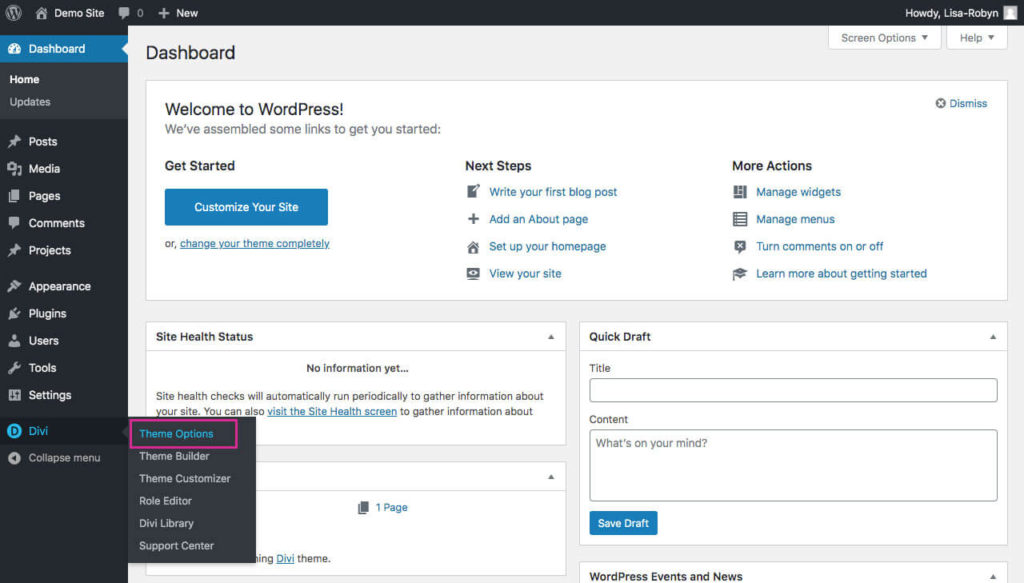
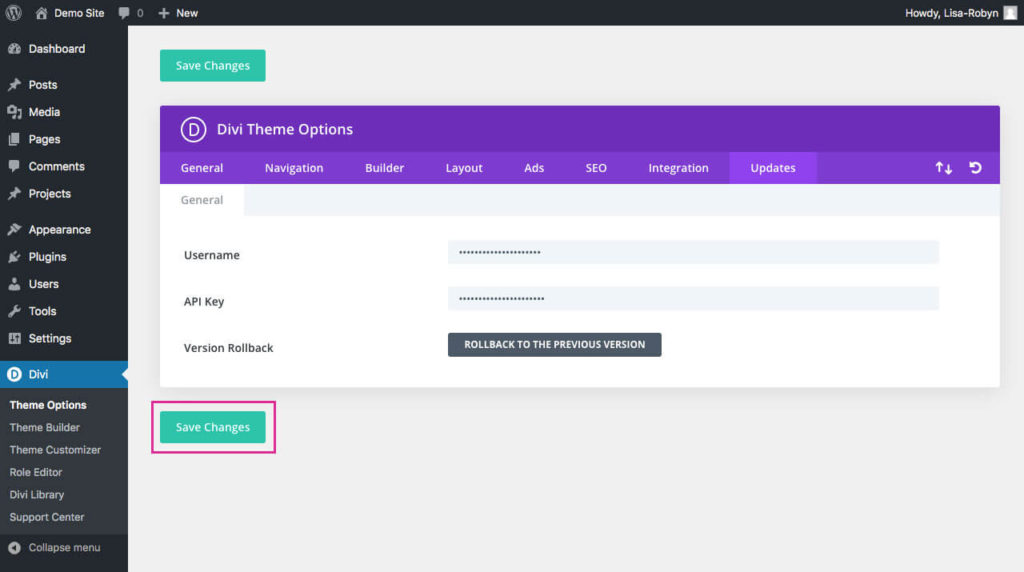
In the Divi Theme Options menu, click on the Updates tab.
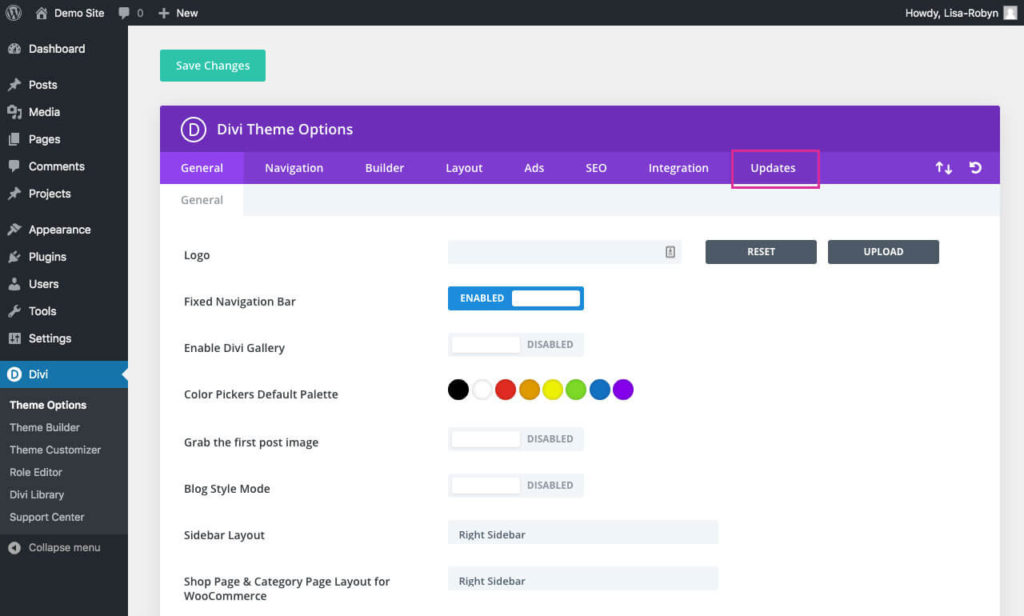
Here you will see two text entry sections for both the username and the API key. Paste the username copied from your Elegant Themes account into the username tab.
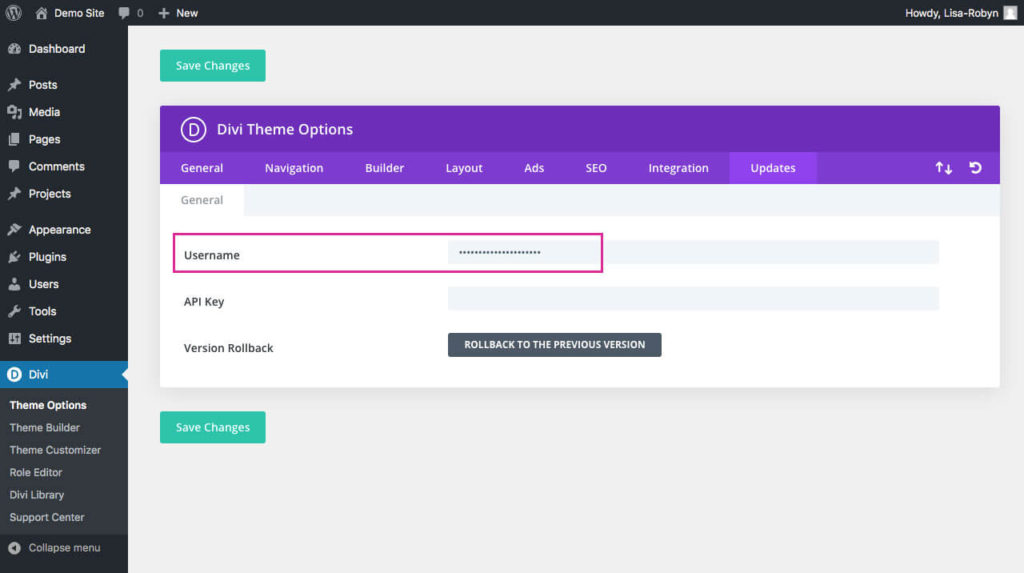
Repeat the same step with the API key. Head back to your Elegant Themes account and copy the API key from your members account dashboard.
Then return to your WordPress website and the Divi Theme Options Updates tab, and paste the API key in the relevant text box. Once your username and API key is entered, click Save Changes.
Now that everything is set up correctly, when an update rolls around, you can rest assured knowing your Divi website is good to go!
A few notes about the Elegant Themes API key:
- You can create multiple API keys from within your Members Area. You can assign a unique API key to each client or each website you create.
- Any point you can choose to either deactivate or delete an API key. Doing so will stop any website with the deactivated API key from receiving updates, however, the site will still remain active and display as is.
What to do if your Divi theme installation is unsuccessful
If for any reason your theme insulation did not run successfully, I suggest contacting Elegant Themes’ support. The support team is super helpful. Either start a conversation from the chatbox on their site or head to the support page.
Using child themes
As soon as you’ve uploaded the Divi theme and enabled your API key, now would be a good time to add a child theme to your website. If you’re not familiar about the term ‘child theme,’ then take some time to learn about this as it’s a pretty significant step in the Divi web design process.
A child theme is a secondary theme that is added to a WordPress website after the main theme. The ‘main’ theme, in this case, will be Divi, and the technical term for the ‘main theme is a parent theme. Using a child theme in development is deemed as best practice, so it’s really worth taking the time to get to grips with it.
Explaining The deep and intricate details of what a child theme is, how it works and why it’s important is definitely going to need an entire blog post, but in the interim, here are just two of the core reasons why you should use a child theme in development.
- If you decide to make any changes to your Divi website, they need to be done in a safe way. What I mean by this is that, periodically, theme development companies (such as Elegant Themes in the case of Divi), will release and push updates of the theme files. If, for example, you have edited the code of the Divi theme directly within the theme files, all of these edits will be lost as soon as a theme update rolls around.
- The Divi theme really is incredible and its modules can be set up and customised in a plethora of ways to create really awesome websites. However, there may come a time where you want to create a really unique look and feel, and the Divi Builder just won’t cut it. For this, you’ll need to edit the PHP files present in the parent theme and place it within your child theme. For example, traditionally, the Divi theme had a seriously boring 404 error page that could not be edited with the Divi Builder. In order to create a custom 404 error page, you had to copy and edit the original 404.php file.
I’ll link a post on child themes here later, for now, I suggest reading about them on the WordPress Codex.
I hope this post was helpful, and that you’re super clued up on installing the Divi theme and authorising your API key!